Evolution comes from understanding the principles behind recipes: useful techniques applicable to more than one meal. Bearing in mind that ovens and animals are both variable creatures.
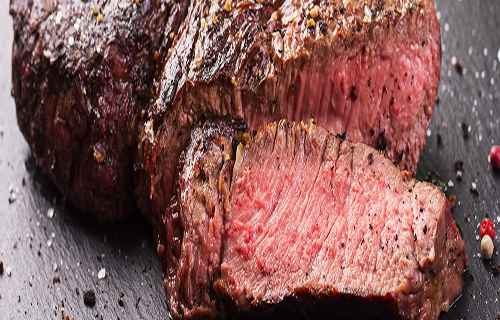
The ideal steak is a matter of taste, but proper cooking involves balancing a high external temperature with a lower internal temperature. Getting the balance right ensures that the steak is tender and juicy on the inside, and browned and flavorful on the outside.
Cooking steak is easy, just throw some butter in the pan and sear that baby for a few minutes, right? This may be an option if you just want an ordinary steak, but did you know that with a few simple tips, you can cook perfect steak? By perfect, we mean mouth-watering, lightly crusted, aromatic, tender steak.
Sear the Meat
Meat must start out totally dry. Surface moisture prevents browning and introduces water into the fat, causing splattering.
Heat the pot, then add just enough oil to lm the bottom. When hot enough, the oil should skim across the surface, and the meat will sizzle on contact.
Sear meat on all sides, even the ends. Use tongs to turn it in the pan, then remove it and discard any discolored oil.
The Vegetables
When added for the sole purpose of flavoring the broth, vegetables are left in larger pieces, like a quarter carrot or half an onion, and then removed. When part of the final dish—as in this one—vegetables are uniformly cut for even cooking (like half-inch dice or matchsticks, called julienne). Stir in the cut vegetables, which will then release their natural moisture, deglazing the pan. When you have some loosened fat as a cushion, add delicate items like garlic, ground spices, or dried herbs. If tomato paste is being used as a flavoring agent, stir it into the vegetables during the last minute or so, giving it a chance to toast.
Deglaze the Pan
Deglaze the pan by adding a cup or two of wine or citrus, and reduce the liquid by at least half while scraping any meaty bits from the bottom of the pan.
Add the Cooking Liquid (and the Meat)
Return the meat to the pot. Add your braising liquid (about two-thirds up the sides of the meat) and bring it to a simmer—this temperature is critical to the success of the final dish. The surface of the liquid should be gently trembling, never at a rolling boil, which toughens the proteins in the meat.
Add the Fancy Aromatic Sachet
Directly into the liquid, then cover the pot tightly to prevent evaporation. (To make a sachet, use kitchen twine and cheesecloth, or even a white paper coffee filter in a pinch.)
The Braise
Transfer covered pot to a moderate preheated oven— 325 degrees Fahrenheit—and wait. Tenderness, not time, is the indicator of doneness. Insert a fork and twist. If the meat comes apart, it’s done.
Skimming and Reduction
When the meat is done, discard the sachet. Remove the meat, which may be delicate by this time, using a kitchen skimmer—a large at spoon with holes that allows you to gently lift the meat and leave the liquid behind.
Skim the fat with a ladle. Reduce what’s left over a low flame. This step eliminates water, leaving a richer, more intensely fortified sauce behind.
Mounting and Garnish
Take the time to finish your sauce, giving it flavor with an ingredient so delicate it can’t go in until the end. Depending upon the dish, it can be something fruity like olive oil, sweet like honey, or the classic addition of cold butter in small pieces. This addition is always done slowly and o the heat, swirling the pan for emulsication (this is called mounting). As a final step, add any herbs or greens that couldn’t be in there for the long haul but will stay bright and green when thrown in at the end.

Pork Shoulder South Philly Style
Meat: 3 1⁄2 lb pork shoulder, bone out, fat cap on, salted
Vegetables: 1⁄2 head fennel, 1 cubanelle pepper (much better variety but you can settle for green pepper), 1 red onion, 3 long hot peppers, all thinly sliced
Other seasoning: 10 garlic cloves (roughly smashed), 1 tsp red-pepper flakes, 1 tsp dried oregano, 3 anchovy filets (chopped)
Flavoring agent: 3 Tbsp tomato paste
Deglazing liquid: 1 cup white wine, 1 cup lemon juice
Cooking liquid: 3 qt chicken stock
Sachet: 1 tsp each coriander seed and whole fennel seed with 1 Tbsp whole black peppercorns, 2 rosemary stalks, 2 bay leaves Rest, portion, and serve over white beans.
Mounting and garnish: Fresh parsley and oregano and a drizzle of lemon-infused olive oil
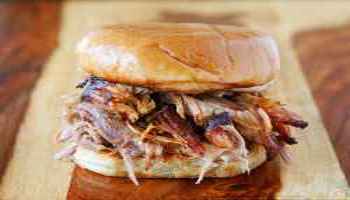
Option: Shred meat into pasta ragu or make a two-handed sandwich

Dry Cooking
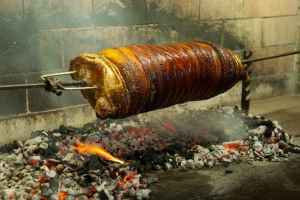
When dry-cooking, the meat comes in direct contact with the heat, as in broiling (heat comes from above), grilling, and the two methods every home cook should master: roasting (meat is surrounded by hot air), and the double-dry hybrid of pan-searing followed by oven roasting. Dry-cooking uses cuts that are already tender, primarily from the part of the animal that doesn’t get much action, like across the upper center. Roasting calls for larger cuts, but unlike old-fashioned spit roasting, in which the meat was exposed to open flame, the oven provides only heat, not flavor. That comes from seasoning and from how good the meat is to begin with.
Here is your template. Armed with this, all you need is the weight of the meat and the temperature you’re aiming for.

Roasting
The meat must start at room temperature. When meat is cold, seasonings sit on top the fat cap and muscle. They don’t penetrate. Room temperature meat allows the salt and pepper to break into that exterior shell, acting as a tenderizing agent as well as deepening flavor.
I use a heavy rimmed baking sheet lined with heavy-duty foil and topped with a at roasting rack. (Those large, expensive roasting pans with handles and V-shaped racks are primarily for turkey.)
Seasoning style depends upon size and cut. For a smaller roast with very little fat cap, like a pork loin, I might make a paste out of salt, pepper, chopped garlic, and a drop of oil (pasty, not runny), smear it on, and give it a chance to sink into the meat, about 20 minutes. For a roast that will bene t from some complexity, like a butter fried leg of lamb, I make a paste of roasted garlic (mellows it), Dijon mustard, rosemary, black pepper, and olive oil, smeared on the inside of the roast (before it is rolled and tied) as well as the outside.
On a larger roast with a substantial fat cap, like a majestic prime rib that can stand on its own flavor-wise, I just liberally season with salt and pepper and roast on top of a bed of aromatics: sliced onions and strong, woody herbs like rosemary and thyme (not soft ones like basil). Placed under the roasting rack, this gives the exterior crust a great aroma without flavoring the meat itself.
Heat
When a roast goes into a hot oven, moisture trapped in the fibers of the meat is pulled toward that heat source. While you do get a beautiful dark exterior at the end of the roasting period, you also get a well-done rim around the edge—not desirable. But if you use a low-temperature oven, the roast slowly acclimates to the heat, gradually raising its internal temperature. As a result, the meat retains its moisture and has an even texture.
There’s ongoing kitchen controversy about when to oven-sear the meat. Some swear by an initial blast prior to roasting in a moderate oven. I am a practitioner of the reverse sear, rst roasting in a low-temperature oven, then hitting it with the higher heat. I realize this is a break with tradition on what might be our most traditional meal. But why not do everything possible to preserve the meat’s moisture, which is a function of heat plus time. So: When the roast gets to your desired internal temperature in the low oven, it’s time to turn up the heat and brown the fat cap.
There will be rendered fat in the pan. Siphon most o , because you’re about to heat things up to 450 degrees. In a 250-degree oven, that temperature rise is so slow it won’t affect the meat itself. It will just give you a beautiful brown crust. The sign that it’s done: color, which typically happens in about 10 minutes.
Rest
Transfer the roast to a cutting board for about 30 minutes (15 for a small roast). Be patient. If you mess with the exterior too soon, the juices that are drawn to its heat will make a speedy exit rather than be absorbed back into the meat. (While the meat rests, carryover cooking can raise the internal temperature as much as 10 degrees.)

All-American T-bone
Method
Heat oven to 200C/180C fan/gas 6. Put an ovenproof griddle pan on a high heat. Season the steak on both sides, then rub both sides with the garlic cloves, thyme and olive oil. Put the steak in the hot pan and char the underside for 2 mins or until griddle lines appear. Turn the steak over to brown the other side, rub the top with the thyme again, then lay the thyme and garlic on top of the meat.
Once evenly browned all over with griddle lines, put the thyme and garlic to one side, hold the steak with a pair of tongs to cook its fatty side and render it down so it’s soft rather than gristly. This will take a few mins. Lay the steak flat again, put the thyme, garlic and butter on top and transfer the pan to the oven to finish cooking for 4-5 mins, until the meat reaches 62-65C on a probe thermometer (or until cooked to your liking).
Rest the meat for 5-6 mins. Serve on a board or large plate in the middle of the table.
For centuries people have been drying meat in order to prolong its storage life. Nowadays we still use this old technique so as to get to a significant improvement in taste. In the modern Dry Age process both the ripening of the meat and the durability are of major importance. As a matter of fact, we need a longer durability in order to obtain a sufficient ripening time.
Dry Age stems from a time when there were still large herds of buffaloes grazing on the prairies. The animals that were shot were severed into big technical parts and transported to the big cities in unchilled steam train wagons. It was discovered that, by taking out certain planks from the wagon and letting in a sufficient mass of air stream into the wagon, the meat would turn black but stayed wonderfully red inside. Moreover, it didn’t perish and the taste became more tender and much more flavoursome. Even old-fashioned butchers were impressed by this modern-day process although it was applied with varying degrees of success in those days.
So, you will understand that we have tried, tested and further developed this old know-how and adapted it to our present-day needs. In doing so we focussed solely on meat.
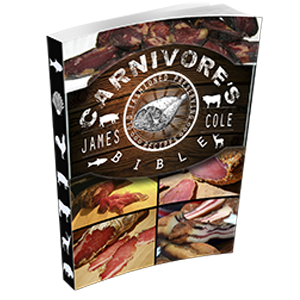
The Carnivore’s Bible system developed by us gives the best possible results ever obtained so far. One of the biggest advantages is its dynamic operating system: it is capable of making a pretty accurate estimate of the quantity of meat to be dried and the stages of the ripening process inside the cabinet. After that, in steps and stages, the process can either be speeded up or slowed down. In this way it is possible to place both fresh meat and meat in various stages of ripening in one and the same cabinet.
All our Dry Age cabinets are partly or completely see-through. You can perfectly witness the changes in the meat and bring these quality products to the attention of your customers and guests. People are usually greatly interested and have a lot of questions to ask.
How to be prepared for a food crisis?
Food Crisis queueIn case of a food shortage you should be aware that grocery stores only have about 3 days of food in stock. People will rush and buy as much as they can so probably the food will vanish in less than a day or hours. So if anything was to disrupt the food supply chain for an extended period of time, there would be chaos in most communities. It’s very important to start preparing NOW. There are several ways to start. The choice you make should depend on the event you are preparing for. Of course the best way is to prepare for all scenarios including long periods.
Books can be your best pre-collapse investment.
Carnivore’s Bible (is a wellknown meat processor providing custom meat processing services locally andacross the state of Montana and more. Whether your needs are for domestic meator wild game meat processing)
The Lost Book of Remedies PDF ( contains a series of medicinal andherbal recipes to make home made remedies from medicinal plants and herbs.Chromic diseases and maladies can be overcome by taking the remediesoutlined in this book. The writer claims that his grandfather was taughtherbalism and healing whilst in active service during world war twoand that he has treated many soldiers with his home made cures. )
Easy Cellar(Info about building and managing your root cellar, plus printable plans. The book on building and using root cellars – The Complete Root Cellar Book.)
The Lost Ways (Learn the long forgotten secrets that helped our forefathers survive famines,wars,economic crisis and anything else life threw at them)
LOST WAYS 2 ( Wordof the day: Prepare! And do it the old fashion way, like our fore-fathers did it and succeed longbefore us,because what lies ahead of us will require all the help we can get. Watch this video and learn the 3 skills that ensured our ancestors survival in hard times offamine and war.)
Survival MD (Best Post Collapse First Aid Survival Guide Ever)
Conquering the coming collapse (Financial advice and preparedness )
Liberty Generator (Build and make your own energy source)
Backyard Liberty (Easy and cheap DIY Aquaponic system to grow your organic and living food bank)
Bullet Proof Home (A Prepper’s Guide in Safeguarding a Home )
Family Self Defense (Best Self Defense Strategies For You And Your Family)
Survive Any Crisis (Best Items To Hoard For A Long Term Crisis)
Survive The End Days(Biggest Cover Up Of Our President)
Drought USA(Discover The Amazing Device That Turns Air Into Water)


