Growing Gourmet Mushrooms at Home from Waste Coffee Grounds & Cleaning, and Preserving your Mushrooms
“Tried growing mushrooms before, and it didn’t work” – if I had money for every time someone has said that to me I’d be a very rich man…and probably no longer a mushroom farmer! Mushrooms are notoriously unreliable to grow, partly due to the mass-produced low quality kits that people often try. Almost mystical organisms, they seem to pop up in the wild in an unpredictable way, often only appearing for just 5 or 6 days before vanishing back into the ground again, not to be seen in the same spot for another year or three. Yet, despite a poor reputation amongst home growers, by using a particularly simple technique and getting a bit of insight into how mushrooms grow, it is possible to successfully grow your own gourmet mushrooms at home. So how exactly are mushrooms cultivated? How can you have success at home? And more to that point – what’s all this got to do with waste coffee grounds?
How Mushrooms Grow
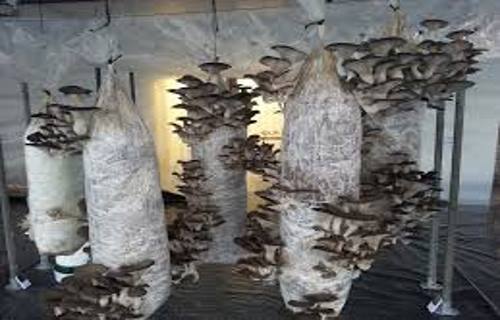
Firstly, you must understand the life cycle of a fungus. Similar to the fruits produced by a tree, mushrooms are the reproductive fruits of a dense, root-like network of cells, called ‘mycelium’. In the wild, this white network of fine threads grows out it all directions, breaking down its food into simpler molecules to further fuel its growth. When it runs out of food, or is put under some other form of environmental stress, it switches into survival mode and produces mushrooms in order to release its spores to the wind and find a better place to live. Fortunately for us humans, it’s possible to recreate and manage this life cycle, and by doing so you can nurture many a fine crop of mushrooms for the table!
Now, it must be said that growing your own mushrooms is definitely more difficult than growing nearly any other crop if you use the standard methods. Mushroom farming normally relies on significant pasteurization equipment and climatic control. This can be hard to recreate at home without spending a fortune.
Now, it must be said that growing your own mushrooms is definitely more difficult than growing nearly any other crop if you use the standard methods. Mushroom farming normally relies on significant pasteurization equipment and climatic control. This can be hard to recreate at home without spending a fortune.
This is where coffee comes in. The beauty of growing mushrooms on fresh coffee waste is that the substrate is already pasteurized by the coffee brewing process, so you can bypass the whole pasteurizing step and get straight into the inoculating. Plus, spent coffee grounds are a huge waste resource, and are packed full of nutrients which your Oyster Mushrooms love to grow on.
Inoculating
Firstly order your spawn in. You’ll have greater success if you use a high spawn: coffee grounds ratio. To begin with, I’d recommend using around 500g of oyster mushroom spawn to each 2.5kg of spent grounds. If the vendor you purchase the spawn from also sells filter patch grow bags, get one of these too. They will increase your chance of success by reducing contamination and providing the perfect growing environment inside the bag. If you can’t source one of these, you can try using a large 2 litre freezer bag, empty ice-cream tub or milk carton – cleaned out well, and with 4 x 5mm holes cut in the sides.
Coffee collection
Go to a busy café and ask them nicely if they can give you some spent grounds. You’ll need enough to fill the bag or container you’re using two-thirds full, and the grounds need to be fresh that day. Most cafes will be happy to do this – if you encounter any problems, just ask at another one. Large cafes get through kilos of the stuff every day, and most are happy to see it going to good use. Take it home and (within 24 hours whilst it’s still fresh) weigh out 2.5kg of coffee into a clean mixing bowl.
Wash your hands and lower arms well and mix your spawn into the bowl, breaking it up and distributing it evenly throughout the coffee. Now load the mixture into your cultivation bag or container and close it up tight, ensuring you have cut the 4 air holes if you are not using the filter patch bags.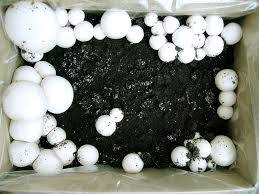
Spawn run
Place your bag/container in a warm (64 – 77°F, 18C – 25°C) and dark place (airing cupboard, under a bed, in a cupboard in a heated room etc). During the next three weeks, you will see the spawn come to life and grow across the coffee grounds – turning the whole mixture white by the time it has fully colonized the mixture. It’s a fun time to keep checking up on it and watch it grow from day to day.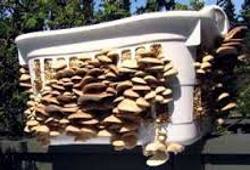
Fruiting
After 3 weeks, your whole bag/container of the coffee and spawn mixture should now look completely white. If you see any areas of green, this is a competitor mold. If it is just a small patch, you can try adding a little salt to the area which should kill it off and still allow the mushroom mycelium to prosper. If the whole bag has gone green, then I’m afraid it’s a lost cause and will most likely be caused by poor quality spawn, or by a lot of mold spores having been mixed in with the coffee grounds somewhere along the way. However, if you have used a high rate of spawn, fresh spent grounds and followed clean hygiene, the chances are you will be looking at a nice white bag of mycelium ready to fruit you some home grown mushrooms.
Place it in a spot with plenty of fresh air and a little light – a shaded windowsill or worktop is ideal. Cut a 5cm x 5cm (2in x 2in) hole in your bag/container and spray this area twice daily with water, trying not to allow it to dry out. Mushrooms love damp, humid conditions, and they will outright refuse to grow if it’s too dry.
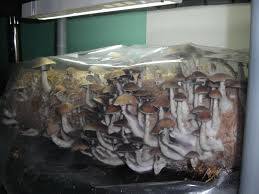
After a week or so, you will start to see tiny little mushrooms bursting into life. Over the following 5-7 days they will double in size every day. This is a really fascinating time! Each day you wake up to find them larger; looking more and more meaty and ready for the eating. When the edge of the caps begin to turn upwards, it’s time to harvest and enjoy the fruits of your labor. Cut at the base of the stems and get cooking!
Cleaning, and Preserving your Mushrooms
The preserving industry processes the fresh mushrooms in different ways. After mushrooms have been picked at the farm, they are transported to the processing factories as quick as possible. The mushrooms are immediately placed in a vacuum where they suck up a lot of water. Mushrooms contain quite a bit of air: by placing them into a vacuum this gets replaced by water, making sure they won’t float to the surface in the blanching kettle.
Blanching mushrooms (dunk them in almost boiling water) is the first step in prolonging the mushrooms’ shelf life. By heating them, the mushrooms are less susceptible to deterioration. The mushrooms find their way via a conveyor belt: a machine slices them, ice water cools them, they’re dried and at the end they roll from the belt into large plastic bags or buckets. It takes just half an hour to process 10 kilos of fresh mushrooms into a bag. When cooled, they keep for six weeks.
As a final step, the mushrooms can be pasteurized or sterilized so they keep even for longer. Pasteurization means mushrooms are heated to 95 degrees Celsius for a while, extending the shelf life to about six months (as long as the mushrooms are kept refrigerated). In case of sterilization, mushrooms are heated to 125 degrees Celsius. Cans of sterilized mushrooms can be kept for a maximum of five years.
Cleaning
Some people believe that you should never put your mushrooms under or into water to remove debris and bugs because it will reduce the mushroom’s flavor. Others believe that the bugs or even the soil found on or in the mushrooms can affect flavor, palatability, and a person’s health. You will have to make up your own mind regarding such things but it is a good rule of thumb to use as little water as possible when cleaning your mushrooms.
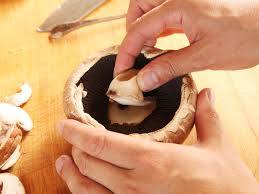
Use a paring knife to cut away or scrape off larger soil contamination and leaves. You can remove finer soil particles with a nylon mushroom brush or a soft bristle toothbrush. Use a damp cloth to wipe the dirt from firm mushrooms, like some of the chanterelles, that are in good condition. If you must incorporate the use of water, try running cool water over the mushrooms, while delicately brushing away debris. A paring knife should also be used to cut away bad portions of the mushrooms, unusable stems and to scrape off debris found in the crevices of some mushrooms.
These three old lessons will ensure your children will be well fed when others are rummaging through garbage bins. Click here to learn all about the 3 skills that will help you thrive in any crises situation.
Wild mushrooms can be buggy. To remove bugs from the mushrooms, most people will soak the mushrooms in salt water for a few minutes in an attempt to draw the bugs out of them. This works well but remember that salt will also draw out moisture and the water can dilute flavor, therefore, avoid keeping the mushrooms in the salt water for an extended period of time.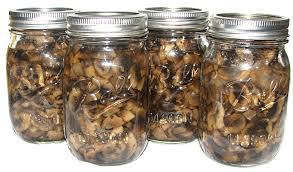
Preserving
There are a number of ways to preserve mushrooms which includes drying, freezing, pickling, salting, powdering, and a few more. We’ll concentrate on the five ways listed here. Let’s start with drying mushrooms.
If needed, remove any stalks or other tough parts and slice remaining pieces thin. Uniformity is not necessary but it does help. If you are using a dehydrator, place the slices on your racks and follow the manufacturer’s instructions. You can dehydrate with your oven by placing the mushrooms on a cookie sheet lined with parchment paper. Set the oven’s temperature to 150o, keep the door ajar and dry the mushrooms thoroughly. Some mushrooms can be dried by threading them with a needle and thread and then hanging them up to dry; a lot of people have done this with morels.
The key to drying is that you remove ALL moisture to avoid spoilage. Once dried the mushrooms can be placed in airtight containers and set into a dark place to avoid mold growing and spoiling them. If you are unsure as to whether or not the moisture is removed, store the containers in a freezer.
Freezing
Some mushrooms can be frozen whole and all of them can be frozen after a short sauté. To freeze mushrooms whole it is recommended that you first drop the mushroom into a pot of boiling water for about one minute. Remove the mushroom from the water and then drain well. Place the mushrooms on cookie sheets and then place the cookie sheet into a freezer for about 30 – 40 minutes or until the mushrooms are frozen. Remove the mushrooms and transfer them to labeled bags. Blew-its, Black Trumpets, Chanterelles, Hedgehogs, Hericium species, and closed (cap is unopened) Agaricus can hold up well to this method of preserving.
If you are going to sauté the mushrooms first, begin by slicing them to your desired size and placing them in a skillet on low to medium heat. Add enough butter to coat the bottom of the pan and prevent the mushrooms from sticking. As the mushrooms begin to cook cover the skillet and allow the water to be drawn out of the mushrooms. Keep covered for a few minutes and stir occasionally. Remove the cover and allow the water to cook away. Remove from heat, cool and then place them in storage containers, about one cup per container, and freeze for later use.
These three old lessons will ensure your children will be well fed when others are rummaging through garbage bins. Click here to learn all about the 3 skills that will help you thrive in any crises situation.
Preserving mushrooms in vinegar, oil or salt
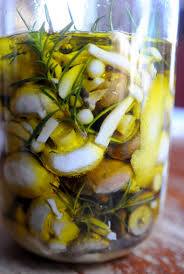
Mushrooms can also be preserved in vinegar or oil. In Eastern Europe they mostly use vinegar, while preserving in oil is common in the Mediterranean. A well-known example are mushrooms eaten as an Italian antipasto or starter. In China, mushrooms are often preserved in salt. The distances to preserving factories in China are too large, which makes it impossible to process fresh mushrooms. A disadvantage of preserving in salt is that the mushrooms have to be rinsed in a large amount of water to prevent them from tasting too salty. This does not have a favourable effect on the flavour. That is one of the reasons why consumers around the world choose Dutch preserved mushrooms. Because the processing industry and the growers are located so close to another, mushrooms can be processed immediately after harvest. Therefore Dutch mushrooms retain their strong fresh mushroom flavour, whether packed in a can, jar, bag or bucket.
Powdering
Thoroughly dried mushrooms can be turned into a powder and used to flavor stews, soups, and other dishes. Simply place your dried mushrooms in a coffee grinder and grind them to a fine powder. Place the powder in a well sealed jar and store in a cool place. Powdered mushrooms can have a very intense flavor so you may want to use the powder a bit sparingly. You will have to experiment with its use over a period of time.
Some of the more common mushrooms used for this sort of preservation are Boletes, Puffballs, and Agaricus.
Pickled
Mushrooms can be pickled using a standard pickling brine and pickling techniques. If you know how to pickle cucumber you know how to pickle mushrooms. Some people dress up their pickling brine by adding flavored vinegar, chilies, or spices to complement the mushroom’s flavor.
RELATED : The Best 5 Gardening System to Grow Food for all Your Family Every Year Even in a Desert
Mushrooms have a positive influence on the immune system. Extensive research has shown that the almond mushroom effectively supports and modulates the immune system.
Mushrooms are a rich source of antioxidants and contain certain fibres called non-water soluble 1.3-1.6 betaglucans, which are known to enhance the resistance against infection. Very high concentrations of these fibres were found in particular in the almond mushroom or Agaricus Blazei Murill (Murill). A well functioning immune system is important because it keeps harmful external influences away. These extraordinary fibres are not commonly found in other foodstuffs. Due to their immunomodulatory actions, mushrooms are a good choice to add to your diet.
Other useful resources:
The Lost Ways (Learn the long forgotten secrets that helped our forefathers survive famines,wars,economic crisis and anything else life threw at them)
Survival MD (Best Post Collapse First Aid Survival Guide Ever)
Backyard Innovator (A Self Sustaining Source Of Fresh Meat,Vegetables And Clean Drinking Water)
Blackout USA (EMP survival and preparedness)
Conquering the coming collapse (Financial advice and preparedness )
Liberty Generator (Build and make your own energy source)
Backyard Liberty (Easy and cheap DIY Aquaponic system to grow your organic and living food bank)
Bullet Proof Home (A Prepper’s Guide in Safeguarding a Home )
Family Self Defense (Best Self Defense Strategies For You And Your Family)
Survive Any Crisis (Best Items To Hoard For A Long Term Crisis)
Survive The End Days (Biggest Cover Up Of Our President)
Drought USA (Discover The Amazing Device That Turns Air Into Water)
SOURCE : rrich.com

