Home canning is like baking: it’s far more a science than an art. There are some basic rules to learn and follow in order to be successful. The good news is, the rules aren’t that hard to learn, and with everything online today, it’s easier to learn than ever before.
More good news: we’ve summed up all the basics you need to know as an overview to get a good foundation as a beginner.
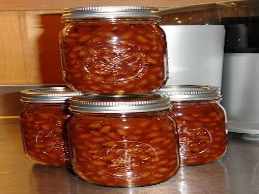
 BAKED BEANS
The quarter-litre (1 cup / 8 oz) sizes are great for people to take for lunches or for singleton friends to have along with their breakfast or suppers — and, they’re more realistic in terms of calories of what a portion of baked beans should be. Because while this is wholesome, and no baked beans are ever going to be healthier, it’s still hearty, with a fair portion of your daily calories (around 300).
Larger family-size jars are nice to have on hand as well for quick shared lunches. Try these beans on pancakes, too, for breakfast, with a few lashings of maple syrup! Delicious!
THE RECIPE
Jar size choices: Either quarter-litre (1/2 US pint / 250 ml / 8 oz) OR half-litre (1 US pint / 500 ml/ 16 oz) OR 1 litre (US quart / 32 oz)
Processing method: Pressure canning only
Yield: 3 x half-litre (US pint) jars
Headspace: 3 cm (1 inch)
Processing pressure: 10 lbs (69 kPa) weighted gauge, 11 lbs (76 kpa) dial gauge (adjust pressure for your altitude when over 300 metres / 1000 feet)
Processing time: quarter-litre (1/2 US pint) OR half-litre (1 US pint): 65 minutes. 1 litre (1 US quart): 75 minutes.
Prep time:
Cook time:
Total time:
Yield: Makes about 6 x 250 ml or 3 x 500 ml jars.
Serving size: 1 cup (250 ml)
Calories: 332
Fat: 2.8 g
- 500 g dried navy beans (2 cups / 1 pound)
- 175 g finely chopped onion (1 cup / 6 oz)
- 6 tablespoons tomato paste (low-sodium if desired)
- 1½ tablespoons Worcestershire Sauce
- 1½ teaspoons Mustard Powder
- 1½ teaspoons salt OR 1½ teaspoons non-bitter salt sub
- 1½ teaspoons ground black pepper
- 3 tablespoons brown sugar OR 3 tablespoons molasses OR 1½ teaspoons stevia (liquid)
- 2 bay leaves
- 1 tablespoon Kitchen Bouquet (optional, for deep colouring)
- 2 bay leaves
- 750 ml bean liquid (3 cups / 24 oz. Recipe will produce it..
- Put dried beans in a pot. Add 1½ litres (6 cups) of water. Boil 2 minutes, remove from heat and let stand for an hour, covered.
- Make your sauce flavouring mixture by mixing together everything from onion down to kitchen bouquet in a large microwave-safe bowl or jug; set aside.
- Drain the beans, discarding the soaking water.
- Put beans in a large pot, add 2 bay leaves, cover with 2 to 5 cm (1 to 2 inches) of water, bring to a full boil, boil for a minute or two, then turn off the heat. Don’t boil much longer or you will end up with mooshy beans at the end of everything.
- Drain the beans in a way that will preserve the water this time. (See suggestions in notes.) Discard the 2 bay leaves.
- Take 750 ml (3 cups / 24 oz ) of that reserved water. Add it to the sauce flavouring mixture you had set aside, cover that bowl or large jug and zap in microwave for 5 minutes to make a sauce.
- Take the sauce out of the microwave, fish out the 2 bay leaves and discard them, stir the sauce. Set aside.
- The headspace on this recipe is 3 cm (1 inch) per jar. Bearing that in mind and taking that into account, fill each jar (minus that reserved headspace in your mind) ¾ full of plain beans.
- Fill up the remaining ¼ of each jar with sauce, leaving still the 3 cm (1 inch) headspace.
- Add additional water to jars from the reserved bean stock if you run short on sauce.
- Debubble, then top up with a bit more sauce or bean stock as needed to maintain the 2 cm (1 inch) headspace.
- So to recap, a jar will 3 cm (1 inch) blank headspace at the top. Of the remaining jar space below that, ¾ of that space will be plain beans, then ¼ plain sauce.
- Debubble, adjust headspace.
- Wipe jar rims.
- Put lids on.
- Processing pressure: 10 lbs (69 kPa) weighted gauge, 11 lbs (76 kpa) dial gauge (adjust pressure for your altitude when over 300 metres / 1000 feet)
- Processing time: ¼ litre (1/2 US pint) OR ½ litre (1 US pint): 65 minutes. 1 litre (1 US quart): 75 minutes.
Processing guidelines below are for weighted-gauge pressure canner.
| Jar Size | Time | 0 to 300 m (0 – 1000 feet) pressure | Above 300 m (1000 ft) pressure | |
|---|---|---|---|---|
| 1/4 litre (1/2 US pint) | 65 mins | 10 lbs | 15 lb | |
| 1/2 litre (1 US pint) | 65 mins | 10 lbs | 15 lb | |
| 1 litre (1 US quart) | 75 mins | 10 lbs |
- One reason that bean soaking water is discarded is that many people believe flatulence-causing sugars leech into the soaking water, so that by getting rid of it, you are making the beans “less musical.” For what it’s worth, the efficacy of this is actually disputed and the science is still out on this. For home canning purposes, there could be a second reason, that of leeching off and getting rid of some bacteria that might be on the beans, so you will definitely want to discard the initial soaking water as they suggest. We’re not sure why they decided to recommend the “quick soak” method in hot water as opposed to an overnight soak.
- To drain the beans in a way that will preserve the second batch of water that was used to par-boil them: either fish them out in scoops using a slotted spoon, or using a small strainer as a scoop (a spider is ideal), or, put a very large strainer or colander over a large bowl and pour the beans and water in, so that the water will get trapped in the bowl while your beans get drained. This sounds more complicated than it is: basically figure out a way to get drained beans by themselves in a large bowl with no water. Discard the bay leaves, if using.
- Don’t worry that the beans are pale and hard, and that the mixture appears to be “pale hard crunchy bean soup” going into the canner. The beans will absorb the sauce and its colouring and it will all thicken up and mix up beautifully in the canner. You actually do want it soupy and liquidy going in to allow for this, and thus to avoid density issues so that heat can travel evenly throughout the jar.
- If you are doubling or tripling the batch, be sure to do the math first on the back of an envelope. Don’t trust your mind to keep it all straight in the thick of it all. A 23 quart pressure canner will hold 18 of the quarter-litre (1 cup / 8 oz) jars.
- Instead of tomato paste, you can use tomato ketchup (if you want your beans to be low-sodium, then choose a low-sodium ketchup.)
- If you are using dehydrated onion, 1/4 cup (4 tablespoons) dried onion flakes = 1 cup fresh chopped. Rehydrate first in some of the bean water you’ll be using for the sauce.
- To play with flavour, you can try adding any or all of these: 1/2 teaspoon ground cloves, 1/2 teaspoon ground allspice, 1/2 teaspoon ground mace, 1 teaspoon maple extract flavouring, per batch
When you’re looking for fast, easy, and reliable recipes, the Pioneer Woman is the ultimate go-to source. You can always count on Lost Ways 2 recipes to be doable, flavorful, and incredibly comforting, no matter what you’re in the mood for. Ahead, we’ve curated some of the Food Network host and Pioneer Woman magazine author’s best and easiest recipes you’d be crazy not to try for yourself, like lemon-blueberry pancakes and butternut squash mac and cheese.
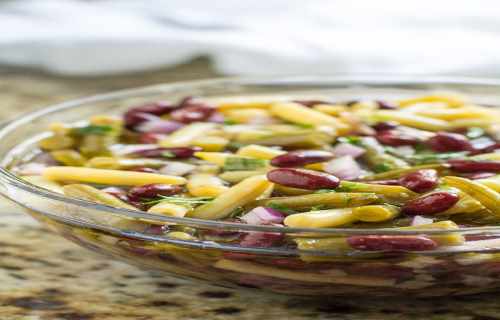
 YELLOW WAX BEANS
Yellow wax beans (aka yellow snap beans) can up beautifully at home. Many people prefer them to home-frozen yellow wax beans, because while most varieties of yellow wax beans can up nicely, only a few varieties of yellow wax beans freeze successfully without becoming mooshy upon being thawed.
They are quick and easy to can.
You can also can them half and half in a jar with a veg that takes a relatively similar time, such as carrots. As with all vegetable combos, you process for the longest time (so that would be 5 minutes longer, for the carrots.) You could also can combined with green beans, which take the same time.
Yellow wax beans must be pressure-canned; there is no alternative way to can them unless you pickle them.
HOME CANNING IS WORTH LEARNING
If you introduce home canning into your home, you are going to discover the paradox that millions of home canners already know: your quality of eating (and living) is going to skyrocket, while your food costs and meal preparation times plummet.
Safe, proper home canning will be one of the greatest life skills you acquire.
It is absolutely worth the effort to learn it correctly right from the start.
LEARN THE UNDERLYING PRINCIPLES
We would advise you if possible to take a bit of time first to inform yourself about the world of canning before you leap into it. Even when you are following a trusted recipe from a reputable source such as the USDA, it’s important to understand the best practices for operating a canner. That’s why the USDA Complete Guide’s very first chapter is called “Principles.”
Learn. Ask questions. Ask don’t be shy about asking “why”, either. Answers you get should be able to NOT ONLY tell you “why”, BUT ALSO cite current reputable sources to back them up. If not, then it’s just hearsay, and you know how reliable that is on the Internet these days. And don’t trust answers backed up with “I’ve always done it this way” or “that’s how my family did it, back to ancient Roman times.” Those answers are big red warning flags.
Later on, you can ponder the gourmet aspect of adding a basil leaf to a jar of strawberry jam. When you are first starting out, though, it’s truly important in canning to learn to walk before you fly. You must learn the methodology to ensure quality products.
We have listed many more learning resources for when your curiosity grows and you are ready to handle more in-depth information.
QUANTITIES OF YELLOW WAX BEANS NEEDED
Numbers are approximate guidelines.
On average, as a very rough guideline, expect to need about 1 kg (2 lbs) of yellow wax beans per 1 litre (US quart) jar of canned yellow wax beans.
- 6 kg (14 lbs) of yellow wax beans = 7 litres (US quarts) canned beans
- 4 kg (9 lbs ) of yellow wax beans = 9 x 1/2 litres (US pints) canned beans
- 1 US bushel yellow wax beans = 23 1/2 kg (30 lbs) = 12 to 20 litres (US quarts) canned beans
THE RECIPE
Jar size choices: Either 1/2 litre (1 US pint) OR 1 litre (1 US quart)
Processing method: Pressure canning only
Yield: varies
Headspace: 3 cm (1 inch)
Processing pressure: 10 lbs (69 kPa) weighted gauge, 11 lbs (76 kpa) dial gauge (adjust pressure for your altitude when over 300 metres / 1000 feet.)
Processing time: Half-litres (pints) 20 minutes; litres (quarts) 25 minutes
Prep time:
Cook time:
Total time:
Yield: varies
Serving size: 250 g
Calories: 75
Fat: 0 g
- Yellow wax beans
- Water
- Wash the yellow wax beans, change water, then re-wash the beans, and give them a final rinse under running water from the tap as you lift them out of sink.
- Top them to get stems off; no need to tail them.
- Leave whole, or chop or break into 2 to 3 cm (1 inch) pieces, or of whatever length you like.
- HOT PACK: Put in a large pot of water, bring to a boil, then boil for 5 minutes. OR RAW PACK: skip this blanching step.
- Pack into ½ litre (US pint) jars or 1 litre (US quart) jars. (Pack more tightly if doing raw pack.)
- Leave 3 cm (1 inch) headspace.
- Optional: a pinch of salt or non-bitter, non-clouding salt sub per jar.
- Top up with clean boiling water (such as from a kettle, for instance), maintaining headspace.
- Debubble, adjust headspace.
- Wipe jar rims.
- Put lids on.
- Processing pressure: 10 lbs (69 kPa) weighted gauge, 11 lbs (76 kpa) dial gauge (adjust pressure for your altitude when over 300 metres / 1000 feet.)
- Processing time: ½ litre (US pint) jars for 20 minutes OR 1 litre (US quart) jars for 25 minutes.
Processing guidelines below are for weighted-gauge pressure canner.
| Jar Size | Time | 0 to 300 m (0 – 1000 feet) pressure | Above 300 m (1000 ft) pressure | |
|---|---|---|---|---|
| 1/2 litre (1 US pint) | 20 mins | 10 lbs | 15 lb | |
| 1 litre (1 US quart) | 25 mins | 10 lbs | 15 lb |
RECIPE NOTES
- Instead of clean boiling water to fill the jars with, you can use the blanching water if you wish. Some experts say use the blanching water, others say use fresh water.
- Hot pack is an extra step, but it is preferred by most experienced canners for a higher-quality end product. “The hot-water blanch is recommended. If not blanched, beans must be packed deliberately tight.”1
- If you do raw pack, the reason that you need to pack them in more tightly is that they will shrink as they lose air during processing.
HOME CANNING INFORMATION FROM BLOGS
There are many good, informative home canning blogs out there that can inspire you to get moving and just do it!
That being said, when looking at actual recipes they might present, see if they credit the recipe to a reputable source and list any modifications they may have done. If they don’t list a source for the recipe, don’t be afraid to ask.
You always want to stick with tested recipes that are from reputable sources, many of which are just a click away. It’s okay if bloggers inspire you to make a pickle recipe from Ball or Bernardin and show you how they did that recipe; you just don’t want them to be making up their own canning recipes.
If they don’t provide a source that is a reputable source, thank them for their time and move on. There are over 2000 tested home canning recipes from reputable sources ready to challenge you: why would anyone spend any time on recipes that might be unsafe or spoil on the shelf?
Books can be your best pre-collapse investment.
Old Time Wisdom ( Timeless Bits of Wisdom on How to Grow Everything Organically, from the Good Old Days When Everyone Did you can prepare yourself for war by moving to the countryside and building a farm, but you must take guns with you, as the hordes of starving will be roaming. Also, even though the elite will have their safe havens and specialist shelters, they must be just as careful during the war as the ordinary civilians, because their shelters can still be compromised.”)
The Lost Ways (Learn the long forgotten secrets that helped our forefathers survive famines,wars,economic crisis and anything else life threw at them)
LOST WAYS 2 ( Word of the day: Prepare! And do it the old fashion way, like our fore-fathers did it and succeed long before us, because what lies ahead of us will require all the help we can get. Watch this video and learn the 3 skills that ensured our ancestors survival in hard times of famine and war.)


