Butter: you use it to make baked potatoes delicious. You smear it on your biscuits and you make finger-licking sauces with it. But what on Earth is going to happen when SHTF and you no longer have access to a grocery store that provides you with it?
Nothing, if you’re a good prepper, because you’re going to know how to make your own. Today we’re going to teach you how to make butter at home. We’ll also touch on something that most people don’t know about: canning butter. Keep reading!
The Science of Butter
It’s always good to know how things work. Butter is formed from the milk fats in the milk. You use cream to make butter, and cream is made up of fat particles suspended in water. When you agitate it by shaking it, it turns to an emulsion of water particles suspended in fat.
{adinserter emp}Before you make butter, you have to let the cream ripen. You do that by letting it set at room temperature for several hours until it begins to sour. At that point, the fat crystallizes and a membrane forms around the fat molecules and further separates it from the water.
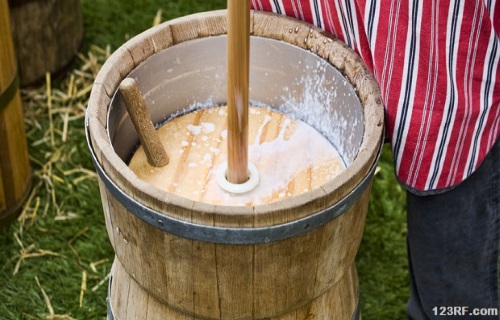
When you agitate it by shaking it or beating it with a churn (called shearing), the fat globules merge and form balls of butter. As you continue to shake it, the fat continues to separate from the water and proteins left in the liquid and forms bigger blobs of butter, and eventually all the butter is one big clump and the liquid left is buttermilk, which is great to cook with or even drink, though it’s definitely an acquired taste!
Start with Good Cream
The best milk to use for making butter comes from cows that yield milk with a high cream content. These are commonly referred to as milk cows (versus beef cattle). Milk breeds include the Guernsey, Jersey, Holstein and Brown Swiss. Of course, all cows make milk but beef cattle breeds offer a lower yield with much less cream.
A good milk cow will yield several gallons per day and the cream separates easily and naturally without any special equipment. Though goats are popular animals for prepping, their milk isn’t ideal for making butter because the cream doesn’t separate easily without the use of an expensive separator.
It also has a different flavor than butter made from cow’s milk. After you milk the cow, make sure to strain your milk to remove any impurities that may have fallen into the milk bucket, then put it in a large jar in the fridge. The cream will separate out within just a few hours.
Use a spoon or a measuring cup to skim the cream off the top of the milk. If you skim off all the cream, you’ll be lift with skim milk. If you leave a bit, you’ll have the equivalent of 1% or 2% milk, just FYI.
Here are some of my favorite canning recipes. I guess they are my favorites because I grow many of these items myself in my garden and orchard. You can also find literally hundreds of canning recipes, and more information on canning techniques in The Lost Ways
Video first seen on Adeldor DIY.
Ripening
To start the process of making butter at home, leave the cream out at room temperature for about 12 hours until it just starts to smell sour. Don’t let it set out too long or else it will ripen too much and your butter will taste sour. However, if you don’t let it ripen enough, it will be hard to separate the fat from the milk.
Shearing
Once the cream has ripened, fill a jar 1/3 full of cream and put the lid on tightly. You can use a churn if you have one or if you want to make a large amount of butter, but the jar method is just as good, if not better. Don’t overfill the jar because it won’t be able to hit the sides of the jar hard enough to make butter.
Begin shaking the jar vigorously so that the cream is banged, or concussed, against the sides and top of the jar. This is what separates the fat molecules from the water and makes them stick together. It’s hard to put a time frame on this process because it depends upon how vigorously you shake, the temperature of the cream, and how well it ripened.
Generally speaking though, it takes anywhere from 15-30 minutes. First you’ll notice that the cream is getting thicker, then you’ll see little blobs of butter forming. Keep shaking until you have one big blob of butter. Once you have this blob, you can stop shaking unless you want a really firm butter.
Straining and Cleaning the Butter
The next step in the process of making butter is to strain it. Using a colander or other straining device, separate the butter from the buttermilk. Leave the butter in the colander and rinse it with cold water for a few seconds. You don’t want to use warm or hot water because it will melt your butter.
As the cold water chills and cleans the butter, it’ll turn into little crumbles instead of one big glob. Now it’s time to get the water out of your butter. Place it in a bowl with enough room to squish it against the sides. Tilt the bowl a bit so that the water can run out as you work the butter against the sides to “wring” it out.
Once it’s fairly firm and there’s no more water coming out, it’s time to salt your butter. A good rule of thumb is 1 teaspoon of salt per pound of butter. You don’t have to salt it but it does add to the flavor. This is really a matter of personal taste so go with what you like.
Pour the salt in and just start working it into the butter with your fingers or a spoon. Don’t over mix it but make sure that the butter is combined. You’ve now officially made butter at home for the very first time. Easy, right? And butter will make an excellent bartering item in a post-SHTF world. To keep your butter from going rancid, refrigerate it.
Canning Your Butter
Canning butter is a great way to prep for a future without access to your cow in a survivalist situation. Here’s the process in a nutshell:
- Place clean pint jars in roaster and heat in a 250 degree oven. Just FYI, it takes a little less than a pound of butter to make a pint.
- While your jars are heating, put your butter in a saucepan or pot and bring it to a simmer. Simmer for about 5 minutes, stirring constantly to keep it from burning. Use this time to heat your lids, too.
- Using a ladle, scoop the butter from the top to the bottom to fill your jars. Do it this way because your butter may have separated a bit and scooping top to bottom helps. Leave 3/4 inch headspace in your jar.
- Carefully and thoroughly clean the tops of your jars. Remove the lids from the boiling water and place on your jars. Screw on the rings.
- Once some of the jars start to ping, indicating that they’re sealing, shake the butter to recombine it because it will separate as it cools into a foamy top and whitish fat on the bottom. Shake while it’s still warm and liquidy and repeat a couple of times as it cools until it remains combined.
- When the butter is nearly cool, put it in the fridge and shake a bit one final time right before it solidifies.
- Your butter should keep for at least 3 years as long as it stays sealed!
Now you know how to make butter at home, as well as how to can butter. This is another great skill that preppers and homesteaders need to know because the more survival skills you have, the better off you’ll be.
This article has been written by Theresa Crouse for Survivopedia.
“MY SURVIVAL FARM”
…and it’s like nothing you’ve ever seen before… An A to Z guide on survival gardening that is easy to read and a joy to put into practice, full of photos, diagrams and step by step advice. Even a kid can do this and, in fact, I encourage you to let the little ones handle it, to teach them not just about self-reliance but also about how Mother Nature works.
Here is just a glimpse of what you’ll find inside:
How to plan, design and put into action high-yield survival garden that will literally keep you and your family fed for life, no matter what hits you, even when everyone else around you is starving to death. No digging and planting year after year and no daily watering because you’ll have more important things to worry about when TSHTF.
How to set up highly nutritious soil for your plants. Do this before you plant anything and you’re on your way to setting your food forest on auto-pilot for decades to come. I’m gonna tell you this one “weird” thing to add to the mulch that’s not only highly effective but also 100% free (because you already have it in your home right now).
Step-by-step instructions on how to plant over 125 plants inside your permaculture garden. Plus, special instructions on choosing the right ones for your climate. From Arizona to Alaska, you can do this anywhere…
How to “marry” your plants. We’re gonna tell you which grow well together and help each-other survive and thrive, so they don’t ever compete for sunlight and nutrients. You get the full table of plants that work well with one another as well as the ones you should NEVER be put together.
Our grandfathers had more knowledge than any of us today and thrived even when modern conveniences were not available. They were able to produce and store their food for long periods of time. The Lost Ways is the most comprehensive book available. All the knowledge our grandfathers had, in one place.Here’s just a glimpse of what you’ll find in the book:
Table Of Contents:
Making Your Own Beverages: Beer to Stronger Stuff
Ginger Beer: Making Soda the Old Fashioned Way
How North American Indians and Early Pioneers Made Pemmican
Wild West Guns for SHTF and a Guide to Rolling Your Own Ammo
How Our Forefathers Built Their Sawmills, Grain Mills,and Stamping Mills
How Our Ancestors Made Herbal Poultice to Heal Their Wounds
What Our Ancestors Were Foraging For? or How to Wildcraft Your Table
How North California Native Americans Built Their Semi-subterranean Roundhouses
Our Ancestors’Guide to Root Cellars
Good Old Fashioned Cooking on an Open Flame
Learning from Our Ancestors How to Preserve Water
Learning from Our Ancestors How to Take Care of Our Hygiene When There Isn’t Anything to Buy
How and Why I Prefer to Make Soap with Modern Ingredients
Temporarily Installing a Wood-Burning Stove during Emergencies
Making Traditional and Survival Bark Bread…….
Trapping in Winter for Beaver and Muskrat Just like Our Forefathers Did
How to Make a Smokehouse and Smoke Fish
Survival Lessons From The Donner Party
Get your paperback copy HERE
Here’s just a glimpse of what you’ll find in The Lost Ways:
From Ruff Simons, an old west history expert and former deputy, you’ll learn the techniques and methods used by the wise sheriffs from the frontiers to defend an entire village despite being outnumbered and outgunned by gangs of robbers and bandits, and how you can use their wisdom to defend your home against looters when you’ll be surrounded.
Native American ERIK BAINBRIDGE – who took part in the reconstruction of the native village of Kule Loklo in California, will show you how Native Americans build the subterranean roundhouse, an underground house that today will serve you as a storm shelter, a perfectly camouflaged hideout, or a bunker. It can easily shelter three to four families, so how will you feel if, when all hell breaks loose, you’ll be able to call all your loved ones and offer them guidance and shelter? Besides that, the subterranean roundhouse makes an awesome root cellar where you can keep all your food and water reserves year-round.
From Shannon Azares you’ll learn how sailors from the XVII century preserved water in their ships for months on end, even years and how you can use this method to preserve clean water for your family cost-free.
Mike Searson – who is a Firearm and Old West history expert – will show you what to do when there is no more ammo to be had, how people who wandered the West managed to hunt eight deer with six bullets, and why their supply of ammo never ran out. Remember the panic buying in the first half of 2013? That was nothing compared to what’s going to precede the collapse.
From Susan Morrow, an ex-science teacher and chemist, you’ll master “The Art of Poultice.” She says, “If you really explore the ingredients from which our forefathers made poultices, you’ll be totally surprised by the similarities with modern medicines.” Well…how would you feel in a crisis to be the only one from the group knowledgeable about this lost skill? When there are no more antibiotics, people will turn to you to save their ill children’s lives.
If you liked our video tutorial on how to make Pemmican, then you’ll love this: I will show you how to make another superfood that our troops were using in the Independence war, and even George Washington ate on several occasions. This food never goes bad. And I’m not talking about honey or vinegar. I’m talking about real food! The awesome part is that you can make this food in just 10 minutes and I’m pretty sure that you already have the ingredients in your house right now.
Really, this is all just a peek.
The Lost Ways is a far–reaching book with chapters ranging from simple things like making tasty bark-bread-like people did when there was no food-to building a traditional backyard smokehouse… and many, many, many more!
Books can be your best pre-collapse investment.
The Lost Ways (Learn the long forgotten secrets that helped our forefathers survive famines,wars,economic crisis and anything else life threw at them)
Survival MD (Best Post Collapse First Aid Survival Guide Ever)
Conquering the coming collapse (Financial advice and preparedness )
Liberty Generator (Build and make your own energy source)
Backyard Liberty (Easy and cheap DIY Aquaponic system to grow your organic and living food bank)
Bullet Proof Home (A Prepper’s Guide in Safeguarding a Home )
Family Self Defense (Best Self Defense Strategies For You And Your Family)
Survive Any Crisis (Best Items To Hoard For A Long Term Crisis)
Survive The End Days (Biggest Cover Up Of Our President)


It is completely unsafe to can butter and furthermore, canning jars should not be heated in the oven. Recommending unsafe practices is irresponsible and could make you liable when someone gets sick or dies!
The can butter stay refrig or put on shelves after cooled
After the butter is canned do you have to keep it in the refrigerator? The article says put it in the refrigerator but not if it is shelf stable.
I have a jar of butter I canned three years ago today, it sits on a shelf in my living room. Looks as good taday as the day I canned it using this same method.